Sale View
This option is available to user for creation of the “Invoices” and “Credit Note” for the customers.
This function has two options.
a. Sales Invoice
This option gives the function to create and send the Invoices to the customers as shown in the image 49.
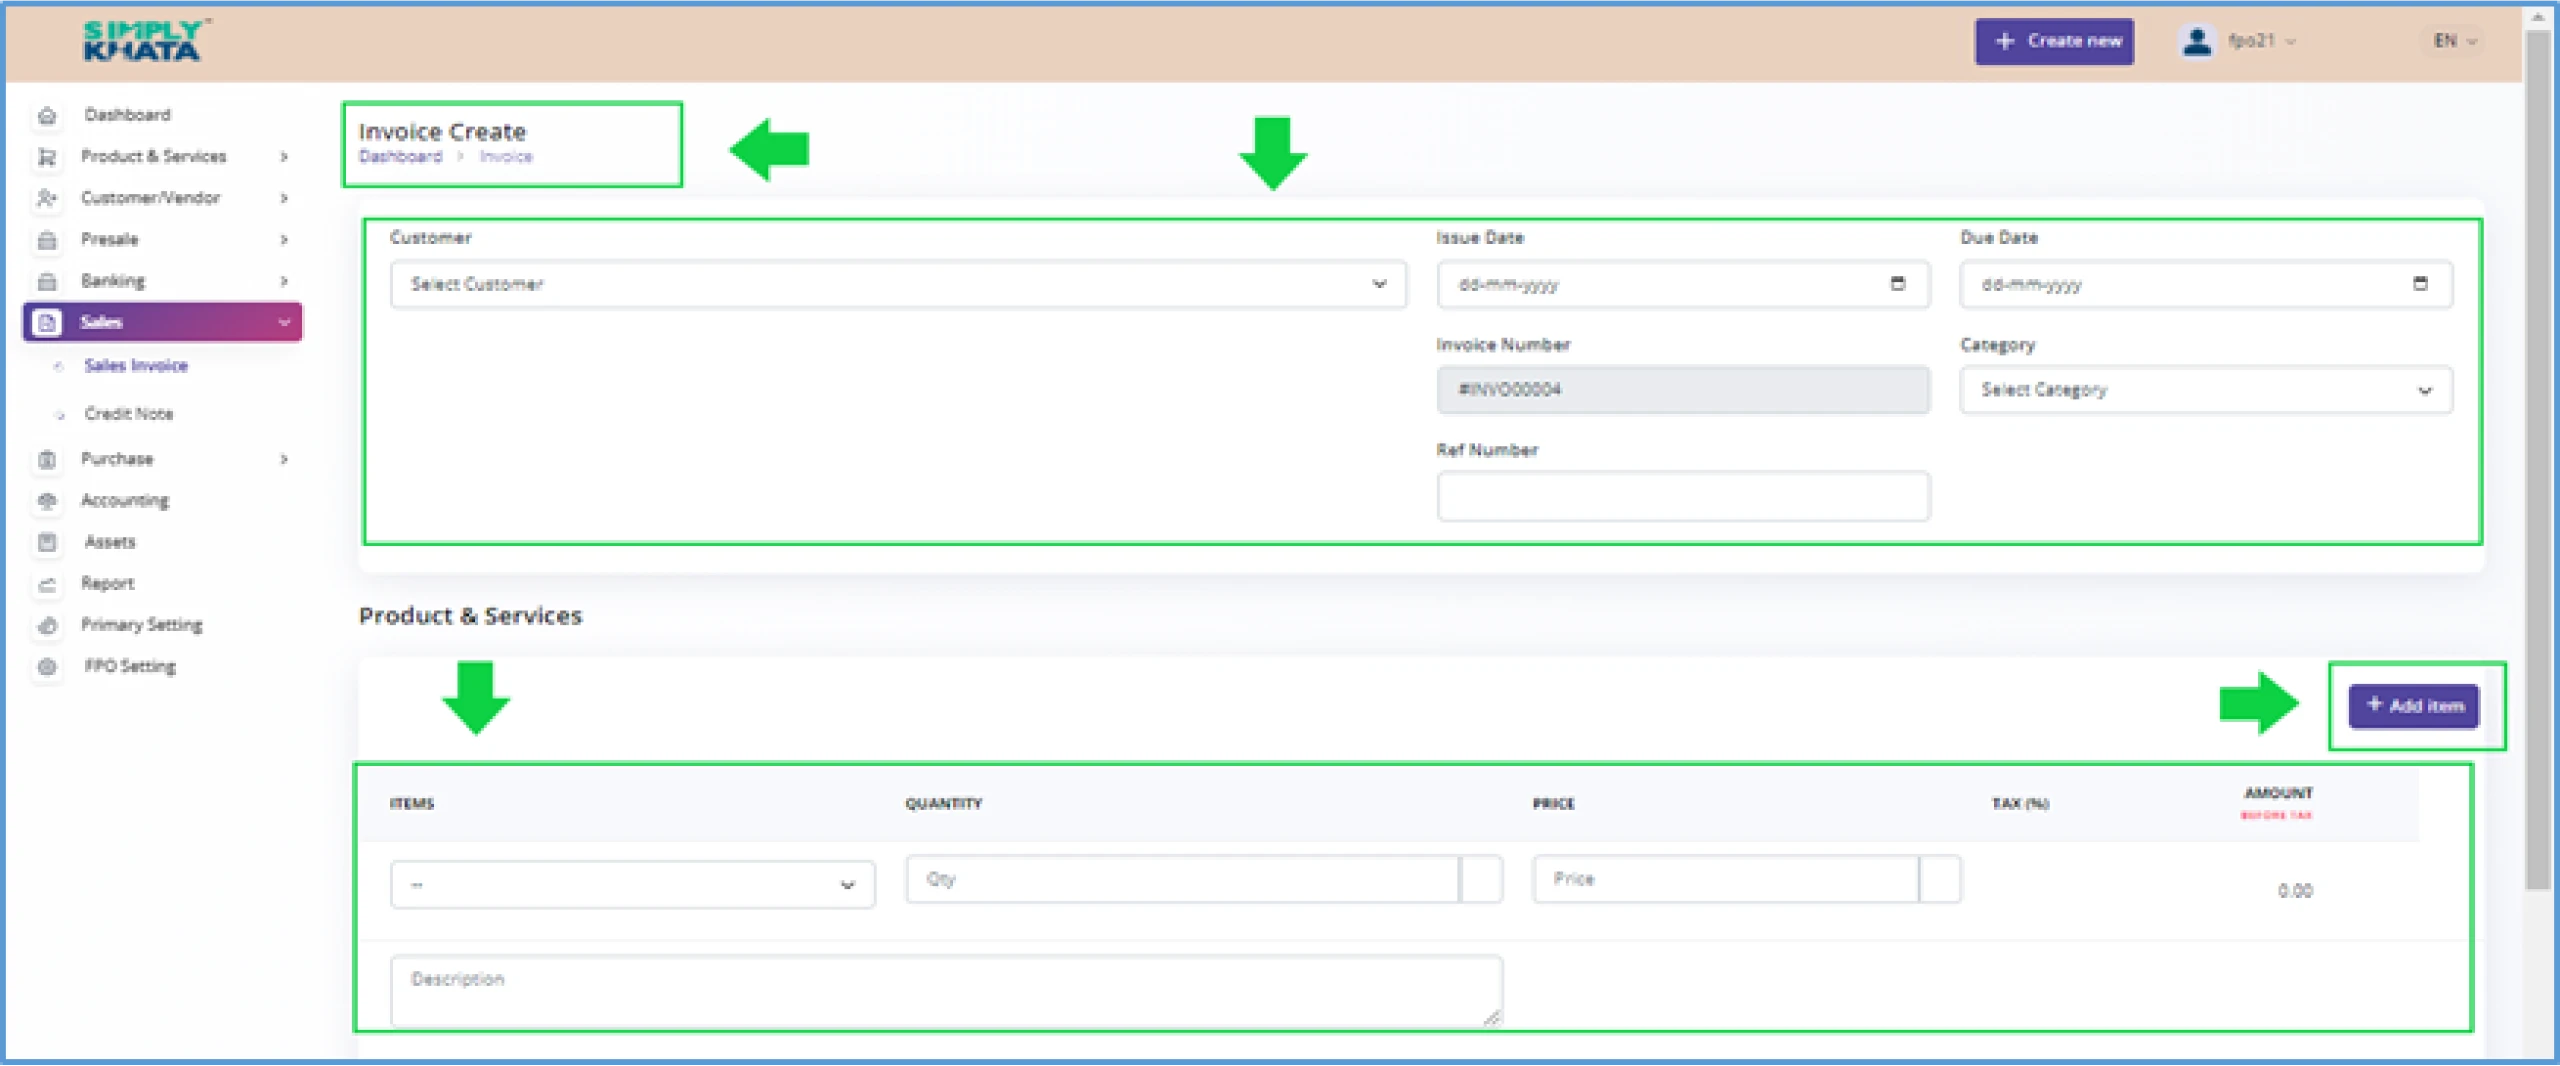
Create Invoice
Click on the small Plus Button as indicated in the Image 39 and provide relevant basic
information like as per Image- 49 .
- Customer > Select Customer from the list
- Issue Date > (dd-mm-yyyy) format
- Due Date > (dd-mm-yyyy) format
- Category > Select Category
- Invoice Number > #INVP00001 (Auto generated)
- Reference Number > Manual Entry for record
- Product & Services (Details) > Add ITEMS > Add ITEMS > Add QUANTITY > PRICE > TAX > (%) DISCOUNT AMOUNT
- Description > Enter the details in the field
User can add multiple items in the Invoice, just by clicking on the Add Item Button just along with
Products and services section as per image- 50. After entering the information as suggested
above, click create Button at the bottom of the page. This action will save the Invoice for system
as draft for transaction use.
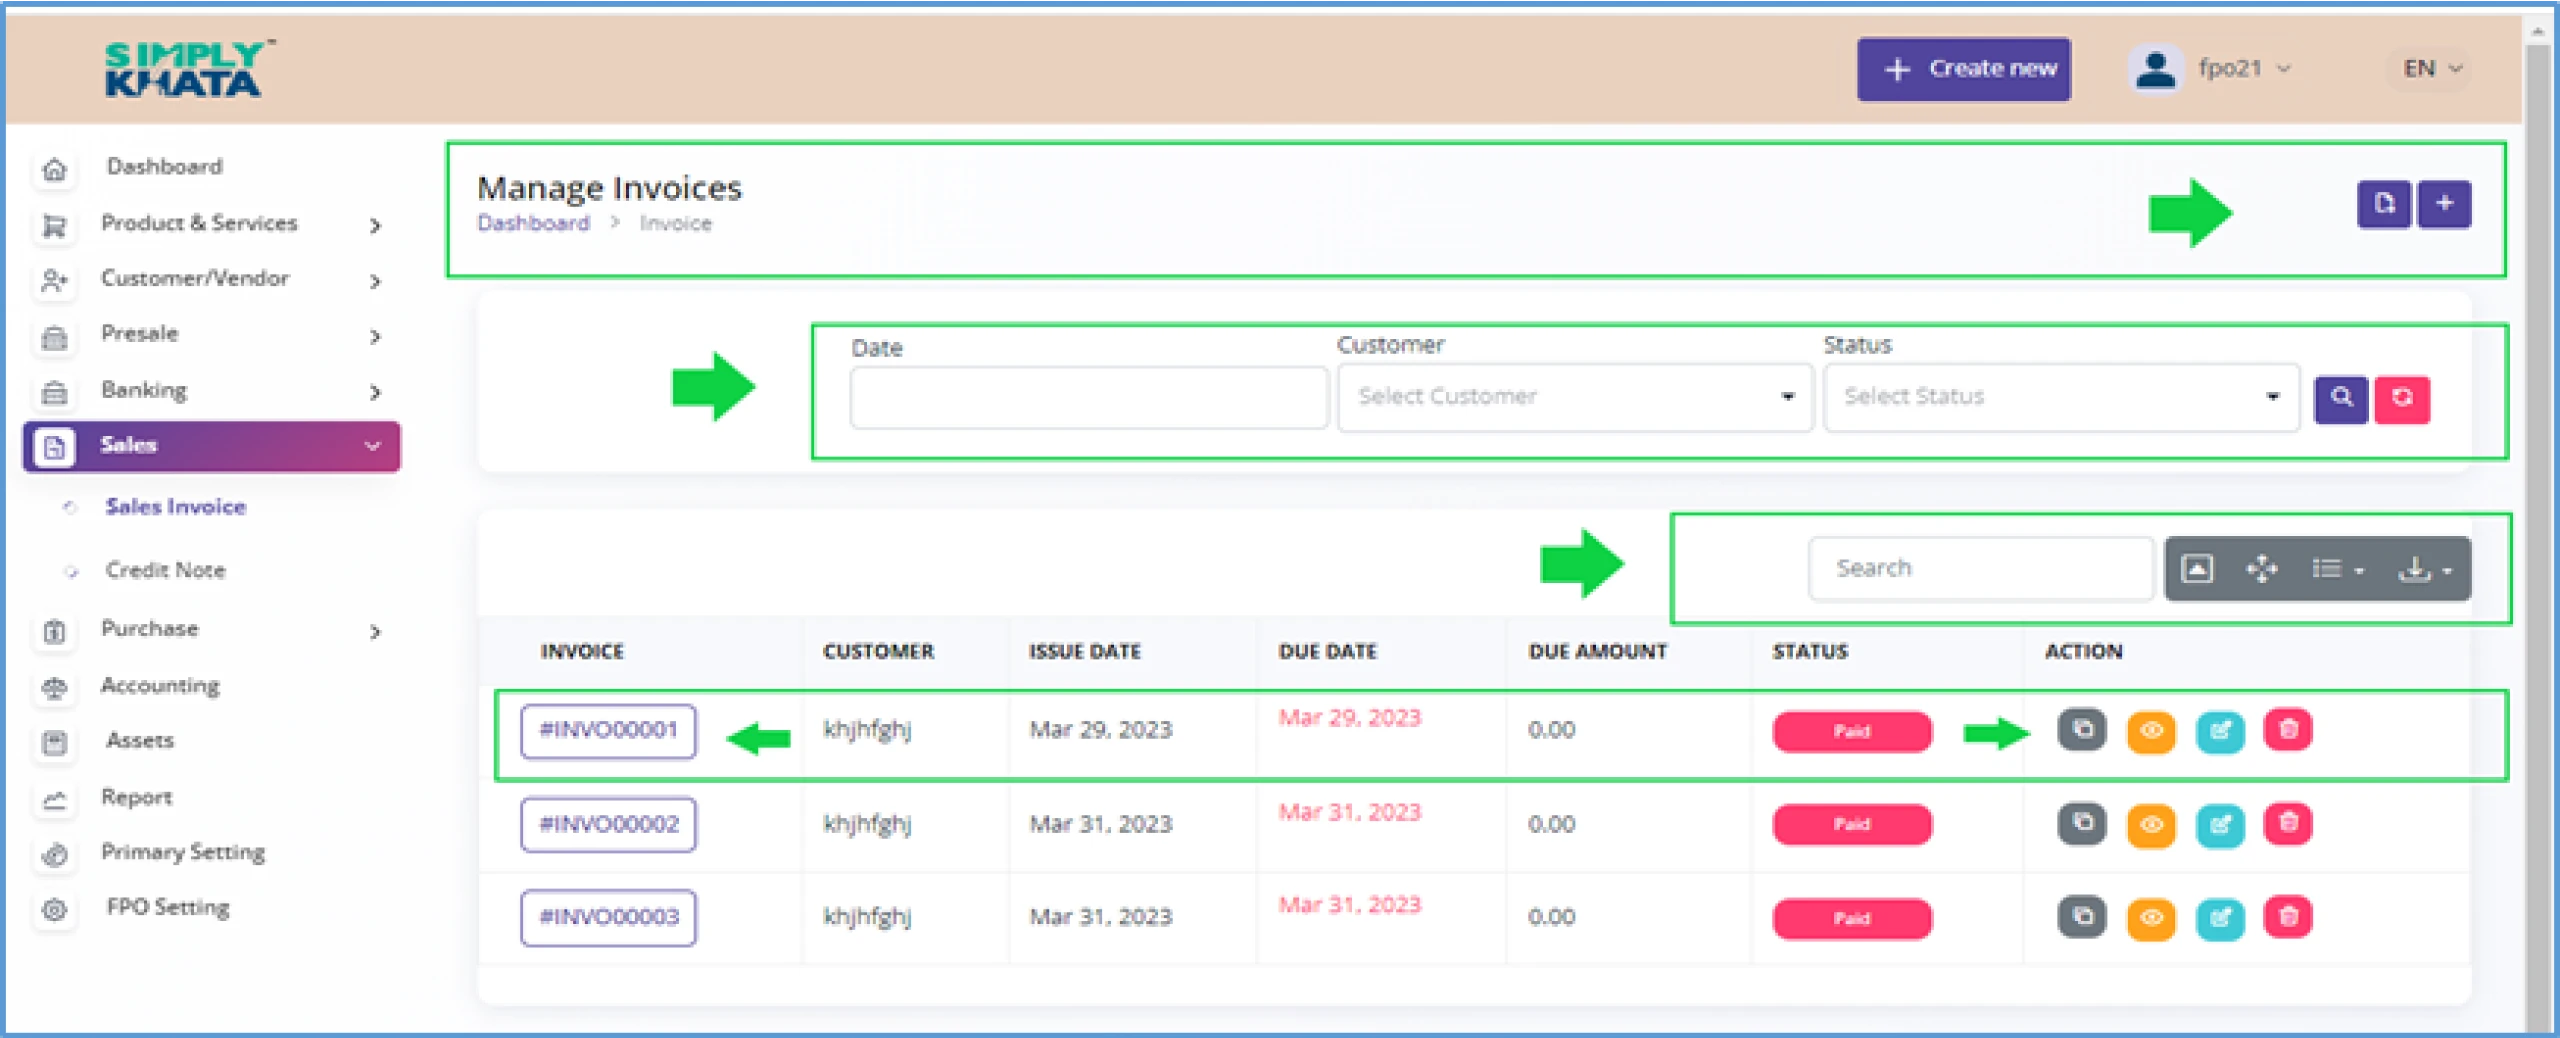
Search Invoice in table
With this option, the user can search the Invoices as per customer,
date and status (Draft, Sent, Partially paid and Paid) from the table as per .
image-49
This option gives uses the list of all the Invoices in a downloadable format like excel or CSV.
View, manage and Delete Invoices
(By going to the Invoices list in table)
In the Invoices table, User can;
-
Duplicate Invoices
(by Clicking Small Duplicate Icon on Invoices List entry)
-
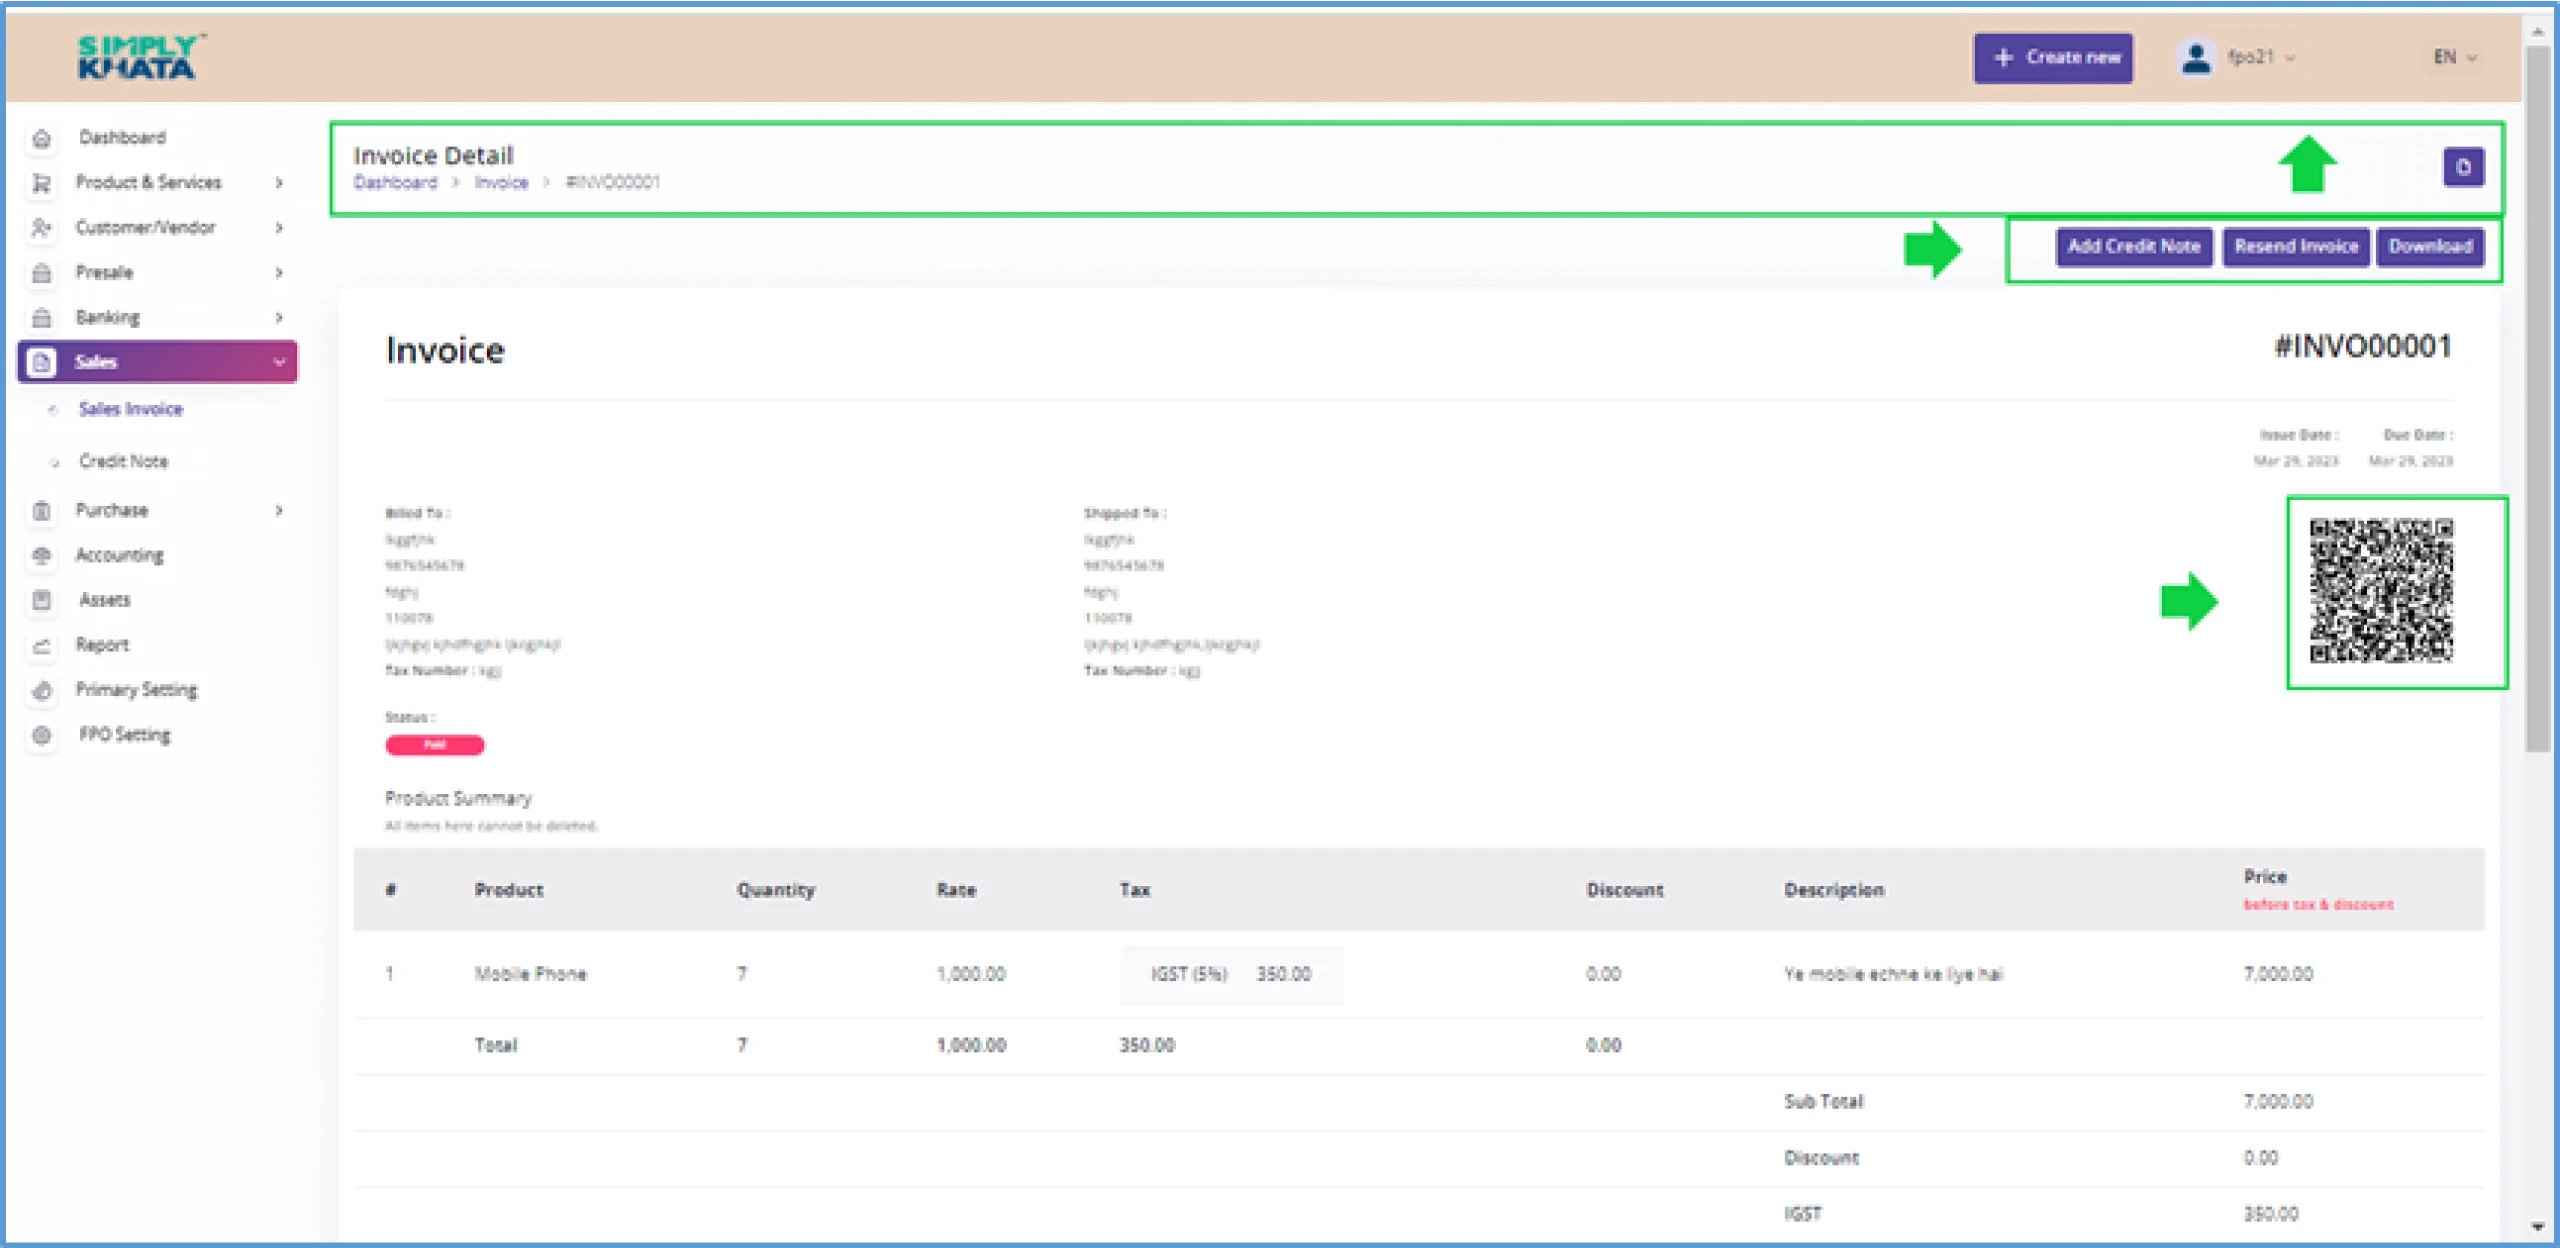
View the Invoices Page
(by Clicking Small Eye Icon an new Invoices detail page opens)
(Image-51)
-
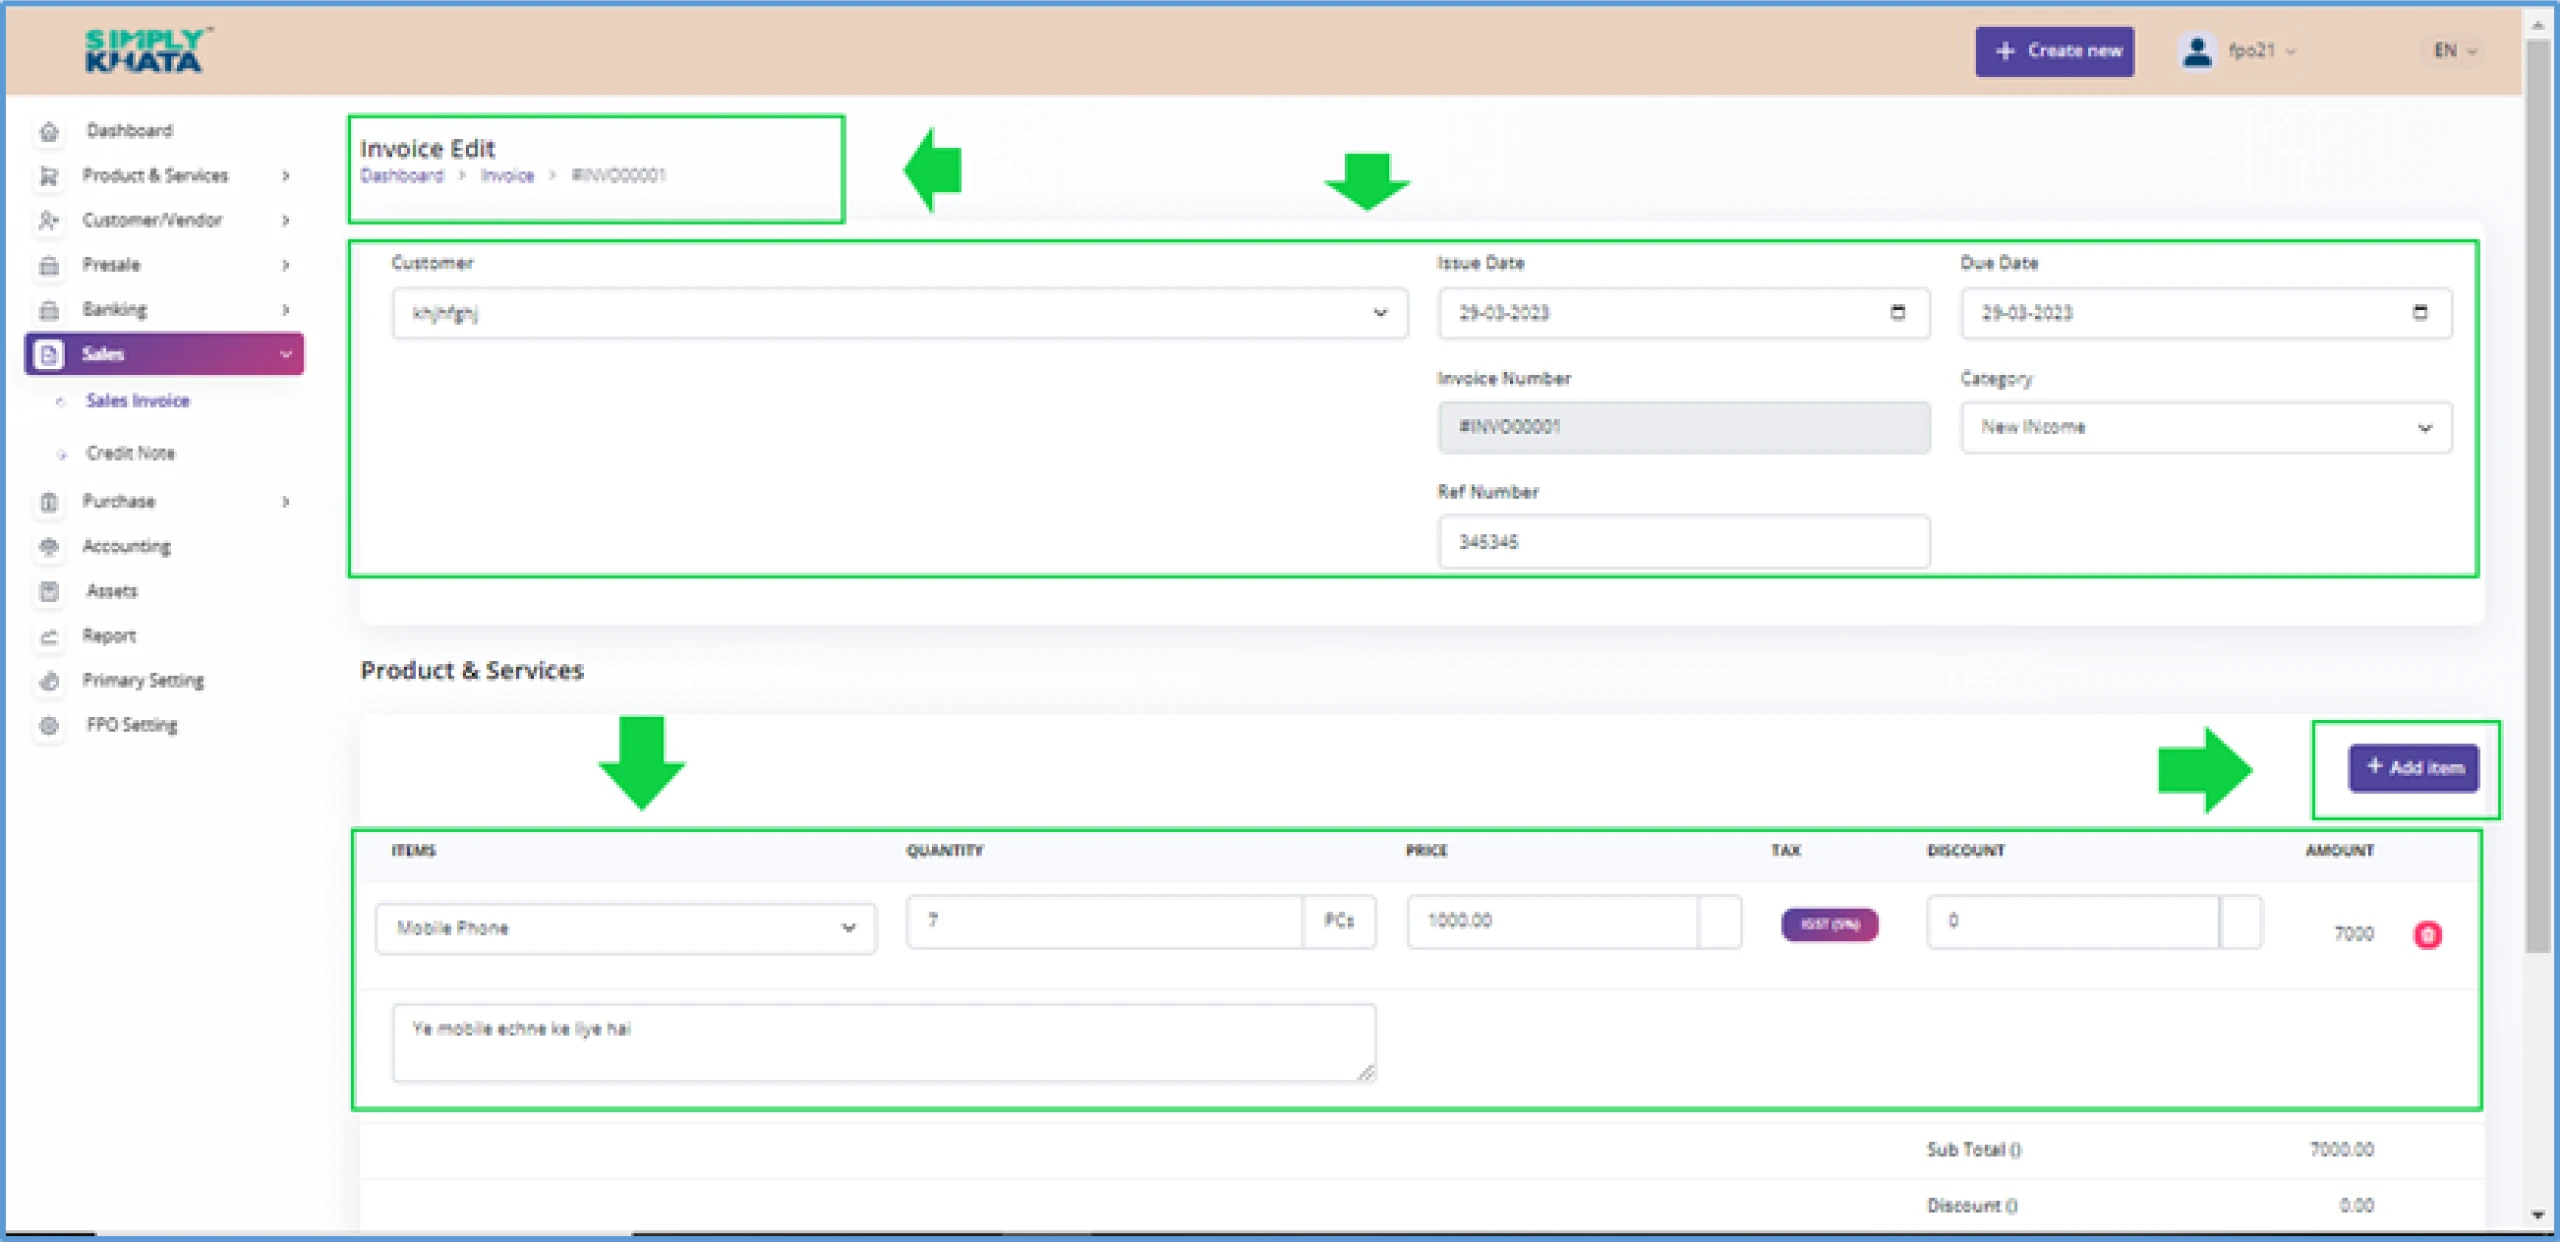
Edit the details of the Invoices
(by Clicking Small pencil Icon and relevant Info entry)
(Image-52)
-
Delete the Invoices.
(by Clicking Small Delete Icon and confirming delete on a page)
(Image-53)
With this option, the user can also search the Invoices as per from the table as per image-49.
This option also gives user the summary of all the Invoices in a downloadable format in excel or in other formats.
(Image -49)
(Image -50)
(Image -51)
(Image -52)
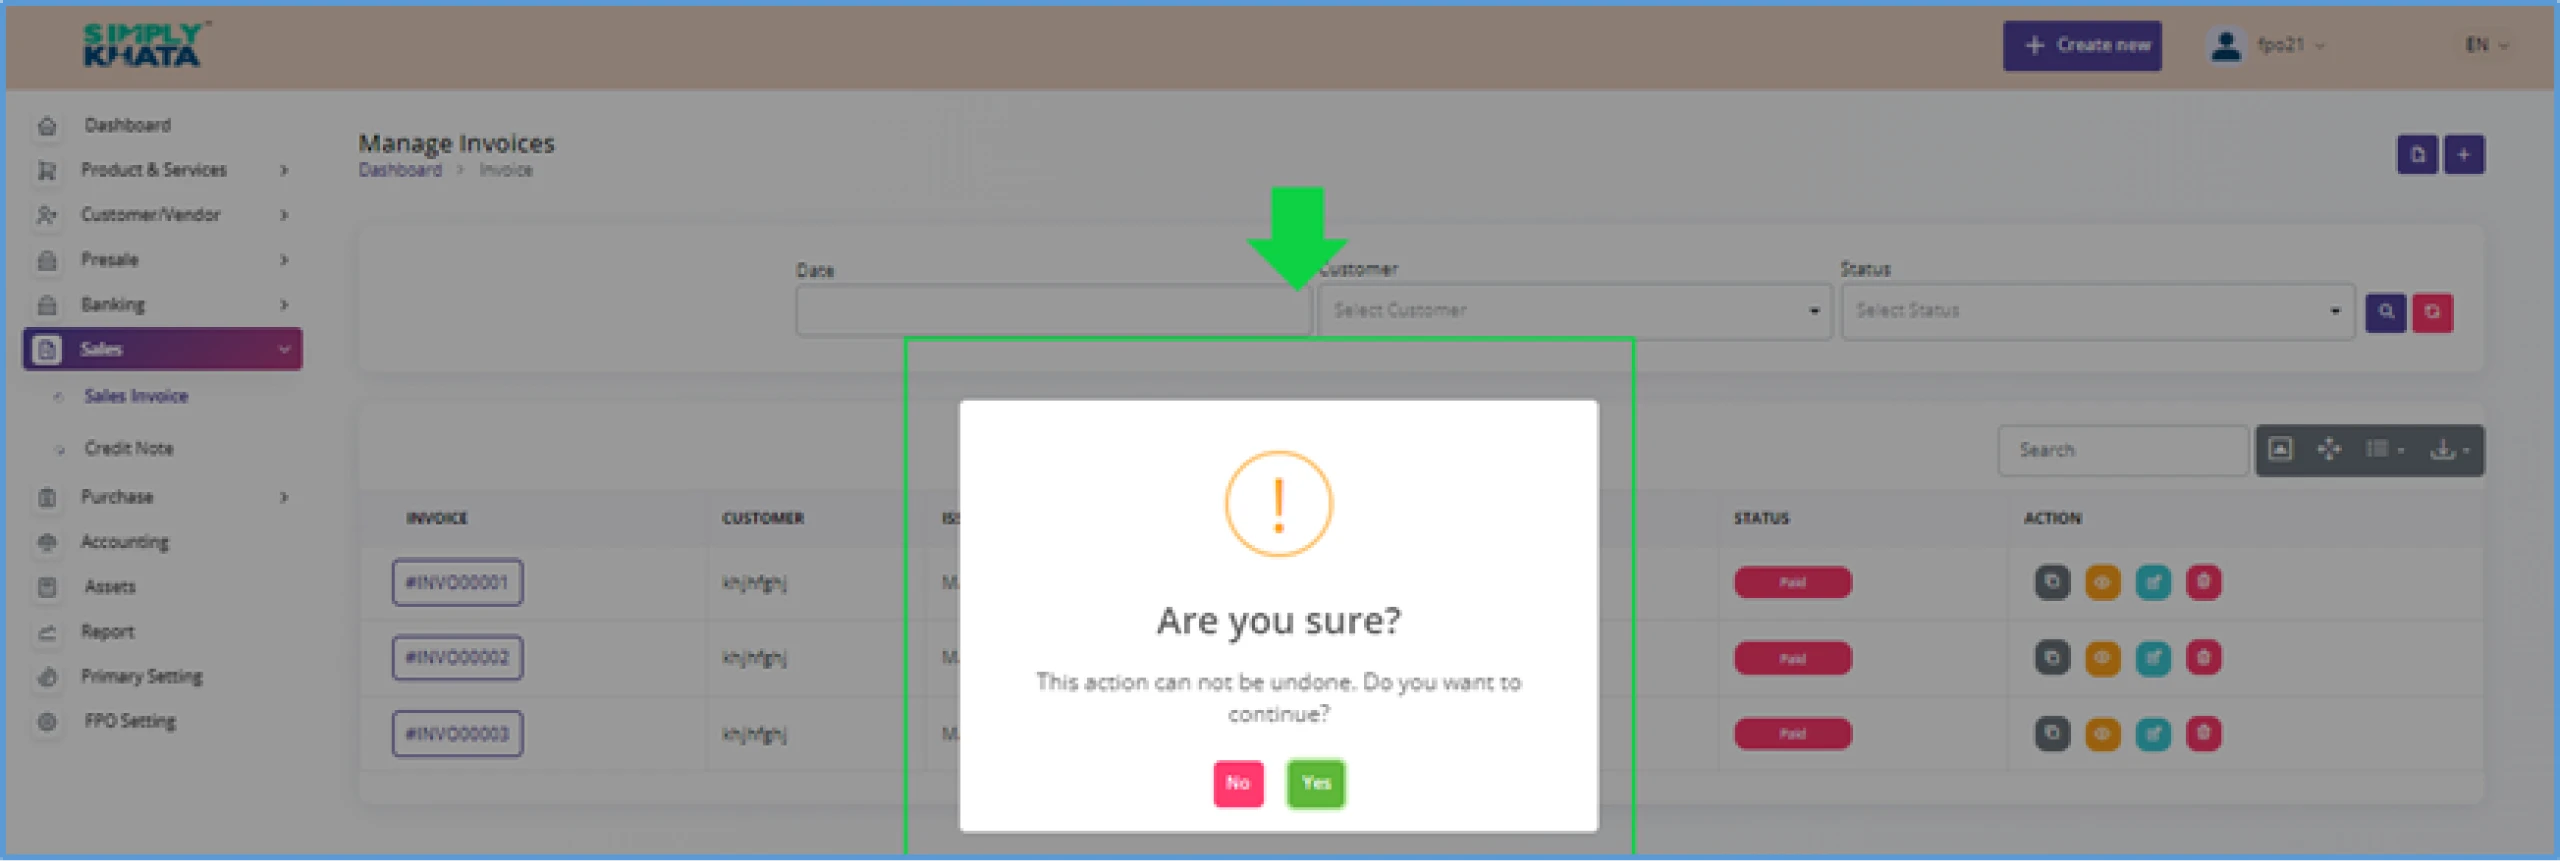
(Image -53)
(Avoid the use delete option until necessary as per Image-48. This will delete all the data of the Retainers)
b. Credit Note
This option gives the function to create and send the Retainers to the customers as shown in the
image 44.
On this page user can also search all the Invoices with credit not from search box.
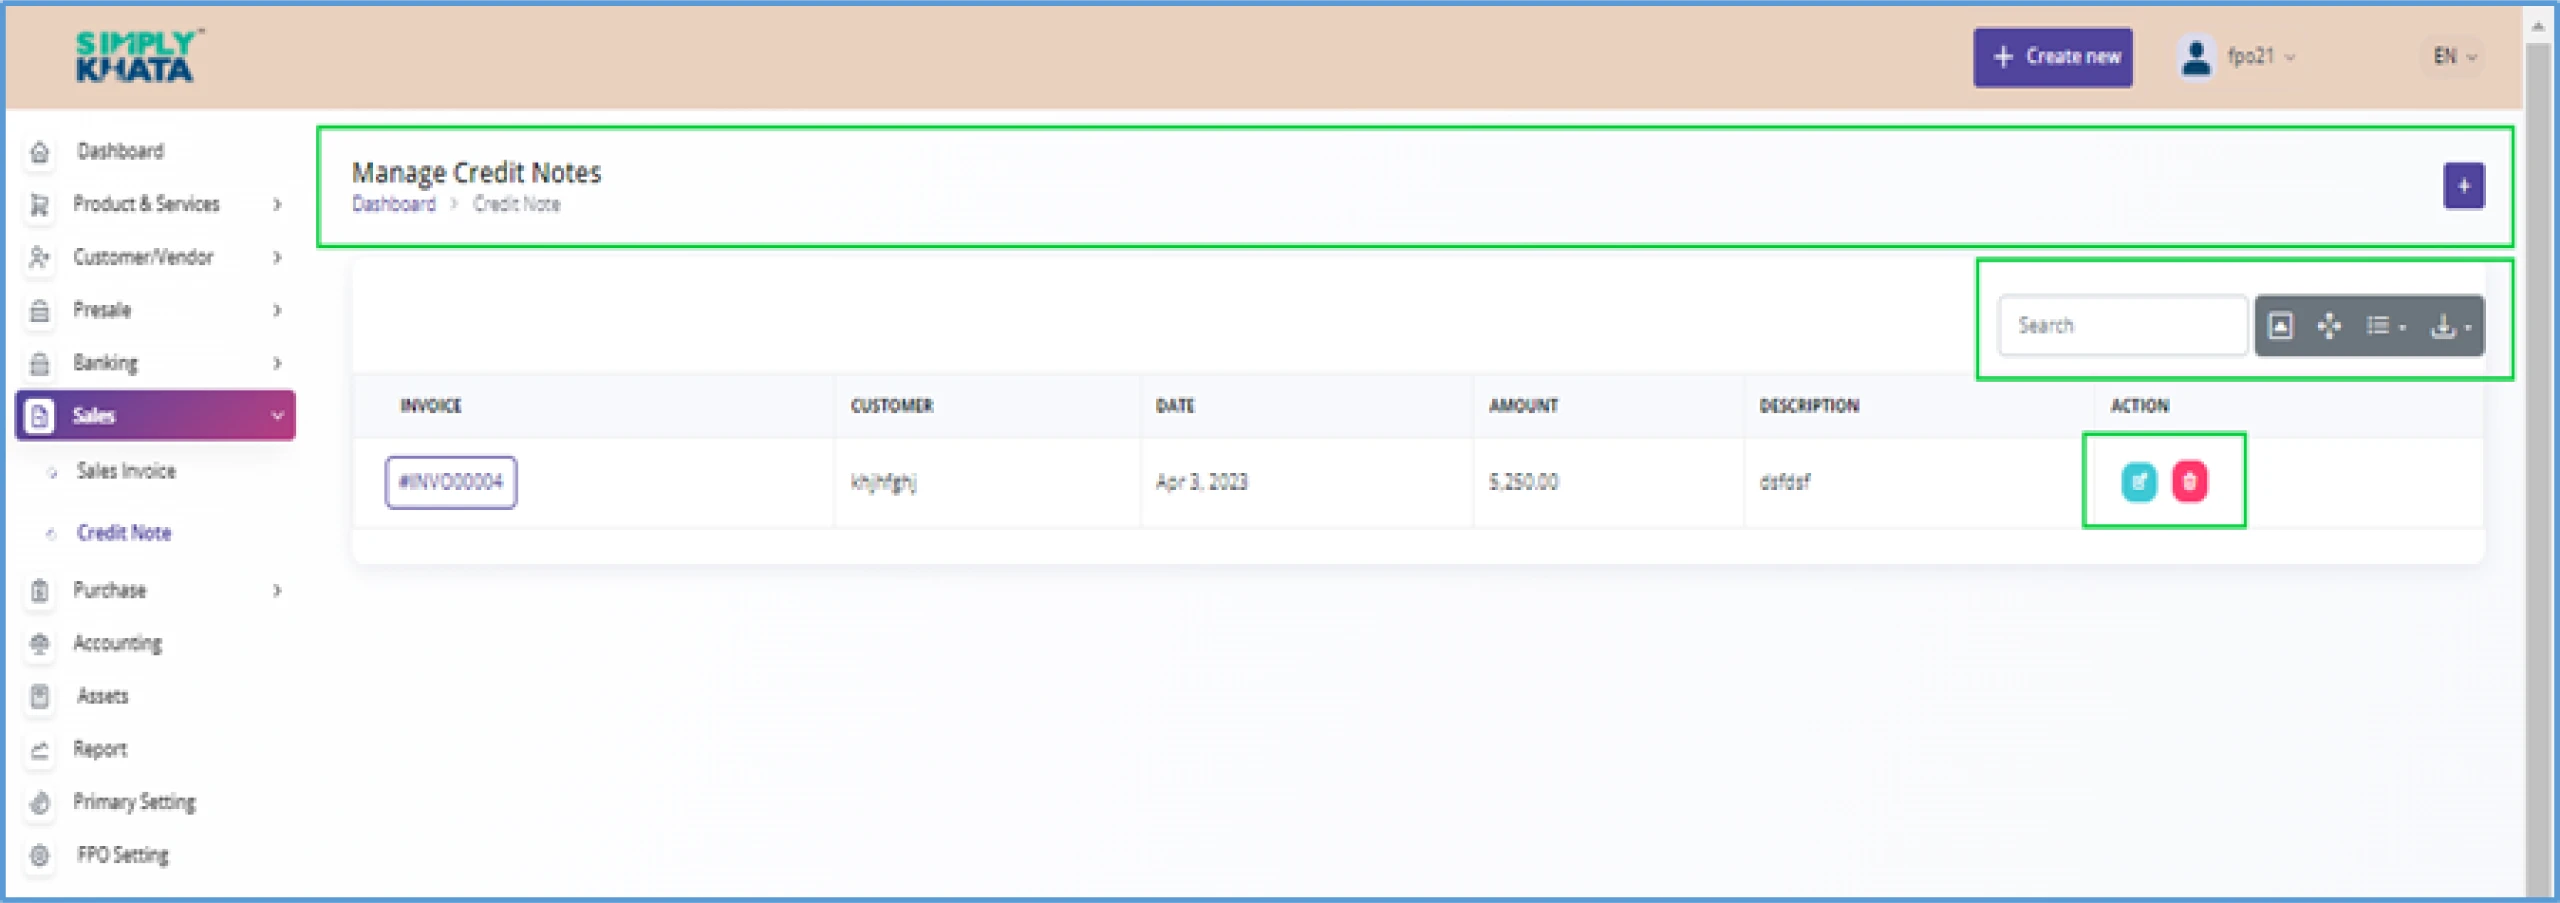
(Image -54)
This option is available to user for creation of the “Invoices” and “Credit Note” for the customers. This function has two options.
a. Sales Invoice
This option gives the function to create and send the Invoices to the customers as shown in the image 49.
Click on the small Plus Button as indicated in the Image 39 and provide relevant basic information like as per Image- 49 .
- Customer > Select Customer from the list
- Issue Date > (dd-mm-yyyy) format
- Due Date > (dd-mm-yyyy) format
- Category > Select Category
- Invoice Number > #INVP00001 (Auto generated)
- Reference Number > Manual Entry for record
- Product & Services (Details) > Add ITEMS > Add ITEMS > Add QUANTITY > PRICE > TAX > (%) DISCOUNT AMOUNT
- Description > Enter the details in the field
User can add multiple items in the Invoice, just by clicking on the Add Item Button just along with Products and services section as per image- 50. After entering the information as suggested above, click create Button at the bottom of the page. This action will save the Invoice for system as draft for transaction use.
With this option, the user can search the Invoices as per customer, date and status (Draft, Sent, Partially paid and Paid) from the table as per . image-49 This option gives uses the list of all the Invoices in a downloadable format like excel or CSV.
In the Invoices table, User can;
- Duplicate Invoices (by Clicking Small Duplicate Icon on Invoices List entry)
- View the Invoices Page (by Clicking Small Eye Icon an new Invoices detail page opens) (Image-51)
- Edit the details of the Invoices (by Clicking Small pencil Icon and relevant Info entry) (Image-52)
- Delete the Invoices. (by Clicking Small Delete Icon and confirming delete on a page) (Image-53)
With this option, the user can also search the Invoices as per from the table as per image-49. This option also gives user the summary of all the Invoices in a downloadable format in excel or in other formats.
(Image -49)
(Image -50)
(Image -51)
(Image -52)
(Image -53)
(Avoid the use delete option until necessary as per Image-48. This will delete all the data of the Retainers)
b. Credit Note
This option gives the function to create and send the Retainers to the customers as shown in the image 44.
On this page user can also search all the Invoices with credit not from search box.